Yes, we know it can be tempting to rush ahead and finish your project as quickly as possible, but when it comes to painting, patience truly is a virtue. So, if you’re wondering just how long should you wait between primer and paint, buckle up and keep reading.
The time you should wait between applying primer and paint depends on the type of primer and paint you are using. Generally, you should wait at least 24 hours between primer and paint application to ensure the primer is completely dry and has adhered well to the surface.
Some primers, particularly oil-based primers, may require a longer drying time. Sometimes, waiting up to 48 hours before applying paint may be best.
It’s also important to consider the temperature and humidity conditions in your workspace, as these can affect the drying time of the primer and paint.
Always refer to the manufacturer’s instructions for specific drying times and other application guidelines for the primer and paint you use.
While many DIY enthusiasts are eager to get their brushes out and start applying paint as soon as possible, one crucial step can’t be rushed: waiting between primer and paint.
By the time you finish reading, you’ll be armed with the knowledge you need to achieve a flawless paint job that will make your DIY-loving heart sing.
Read More about Glow In The Dark Paint: How Long Does It Last
Priming for Perfection: How Long Should You Wait Between Primer and Paint for a Flawless Finish
You’ve done the hard part – prepping the surface, selecting the perfect primer, and applying it flawlessly. But now comes the question – how long to wait before painting over it?
Painting a room can be daunting, but with the right preparation and technique, you can achieve a professional-looking finish that will last for years. One of the most important steps in any paint job is the application of primer, a preparatory coating that helps to create a smooth, even surface to the paint to adhere to.
The first thing to understand is that the time you should wait between primer and paint will depend on various factors, including the type of primer and paint you’re using, the surface you’re painting, and the environmental conditions in your workspace.
It’s advisable to follow the manufacturer’s instructions on your primer label. It may recommend a specific drying time before painting. Most primers generally dry to the touch within 30 minutes to an hour. However, waiting 24 hours before applying paint is best to ensure proper adhesion and avoid peeling or chipping. However, suppose you’re working with a lower-quality product or a particularly porous surface.
In that case, you may need to wait longer to ensure that the primer has fully dried and that the paint will apply smoothly and evenly.
One important factor to consider when timing your paint job is your workspace’s temperature and humidity levels.
High humidity can slow the drying time of primer and paint, while low temperatures can cause the paint to dry more slowly than normal.
Temperature and humidity can also impact drying times. The ideal temperature range for painting is between 50-85°F with humidity between 40-70%. If it’s too cold or humid, the primer and paint may not adhere well, resulting in a sloppy finish.
If you’re working in a particularly humid or cold environment, you may need to wait longer between coats to ensure the paint dries properly.
Ultimately, the key to achieving a professional-looking paint job is to take your time and follow the manufacturer’s instructions for both primer and paint application.
By giving your primer and paint ample time to dry and adhering to the recommended timing and application techniques, you can achieve a flawless finish lasting for years.
Waiting between primer and paint is crucial in achieving the best possible results from your paint job.
While it may be tempting to rush through the process, taking the time to allow your primer to fully dry and adhere to the surface will ensure that your paint applies smoothly and evenly, resulting in a professional-looking finish that you can be proud of.
What Is a Paint Primer?
A paint primer is a preparatory coating that is applied to a surface before the application of paint.
Primers are designed to provide a smooth, consistent surface that allows the paint to adhere better and last longer.
Several primers are available, each designed for specific surfaces and purposes. For example, wood, metal, drywall, and masonry surface primers exist.
Some primers are formulated to help hide stains or discolorations on a surface, while others are designed to fill in imperfections or provide a smooth base for the paint to adhere to.
Primer is essential for several reasons. First, it helps the paint to adhere better to the surface, reducing the likelihood of peeling, cracking, or chipping.
Second, it can help to seal porous surfaces, such as wood or drywall, preventing the paint from soaking in and creating an uneven finish.
Finally, primer can help to provide a uniform base coat that ensures the topcoat of paint goes on smoothly and evenly.
In addition to improving the quality and longevity of the paint job, using a primer can save time and money in the long run.
By providing a smooth, even base coat, a primer can reduce the amount of paint needed to achieve full coverage and reduce the number of coats required to achieve the desired finish.
Overall, a paint primer is an important component of any painting project and should be carefully selected based on the surface and the type of paint used.
By using a high-quality primer and following the manufacturer’s instructions for application, you can ensure that your paint job will look great and last for years.
When Do I Use Primer?
PRO TIP
Applying primer via a spray gun will result in thinner coats in comparison to an application made with a paintbrush.
Primer is an essential part of any painting project and is used to prepare a surface for paint.
It is typically used on new or unpainted surfaces and surfaces that have been previously painted but have been sanded down to the bare substrate or have significant imperfections or stains that need to be covered.
Primer serves several purposes. First, it helps the paint adhere to the surface by providing a clean, uniform surface to which the paint can grip.
Second, it can help to seal porous surfaces, such as drywall or masonry, preventing the paint from soaking in and creating an uneven finish. Finally, primer can help cover up stains or discolorations, providing a clean, neutral base for the paint to be applied.
It’s important to choose the right type of primer for your project. Many different types of primers are available, each designed for a specific purpose or surface.
For example, there are primers for metal surfaces, primers for wood surfaces, and primers for surfaces that have been previously painted.
When selecting a primer, consider the type of surface you will be painting and the type of paint you will be using. Some paints, such as oil-based paints, require specific types of primers, while others may not require a primer at all.
In general, it’s a good idea to use a primer when painting a new or unpainted surface, or when painting over a surface with significant imperfections or stains that need to be covered.
By using a high-quality primer and following the manufacturer’s instructions for application, you can ensure that your paint job will look great and last for years.
Related: Glow In The Dark Paint: How Long Does It Last?
Conditions when the primer application is necessary
- Uneven surface
Uneven or porous surfaces necessitate prepping beforehand with a coat of primer, helping in ensuring that the priming coat seals up the pores and provides an even surface that will bond well with the finishing coat.
- Switching from darker wall color to a lighter one
Painting over a dark color isn’t quite easy because a dark color will require a couple of finishing coats to be painted over it to conceal it.
A white primer will cover a dark color in either one or two coats, thus saving time and the paint required in the overall paintwork.
- A surface having a glossy base
A surface with a gloss base coat limits bonding between the base coat and the finishing coat. Necessitating the application of a primer to act as a base coat.
Can you prime and paint on the same day?
Sometimes, it is possible to prime and paint on the same day. However, it’s important to note that the exact time required between primer and paint application can vary based on several factors, including the type of primer and paint you’re using, the surface you’re painting, and the environmental conditions in your workspace.
Some water-based primers and paints may be able to be applied within a few hours of each other, while oil-based products may require a longer drying time between coats. Additionally, if the surface you’re painting is particularly porous or working in high humidity conditions, you may need to allow more drying time between coats.
If you’re unsure whether you can prime and paint on the same day, it’s always best to err on caution and wait at least 24 hours between coats. This will help to ensure that the primer has fully dried and adhered to the surface and that the paint will apply smoothly and evenly.
Ultimately, the key to achieving a professional-looking paint job is to take your time and follow the manufacturer’s instructions for both primer and paint application. This will help ensure your finished product looks great and stands the test of time.
How many coats of paint after primer?
The number of coats of paint you should apply after primer depends on several factors, including the quality of your paint and primer, the color and texture of the surface you’re painting, and the level of coverage you want to achieve.
Most professional painters will generally recommend applying at least two coats of paint over a primer. This will help to ensure a consistent, even finish and provide the level of coverage necessary to create a lasting, durable paint job.
If you’re working with high-quality paint and primer, you may achieve good coverage with just one coat of paint. However, if you’re working with a less expensive or lower-quality product, you may need to apply additional coats to achieve the desired level of coverage.
Ultimately, the key to achieving a beautiful, professional-looking paint job is to take your time and work methodically, applying each coat carefully and allowing ample drying time between coats. This will help ensure that your finished product looks great and lasts for years.
What happens if you don’t paint over the primer
If you don’t paint over primer, you may experience several issues that can impact your surface’s overall appearance and durability.
Firstly, primer is not designed to be a final coat and is often not formulated to provide the same level of protection or aesthetic qualities as a topcoat of paint. Leaving primer exposed can lead to a dull, unfinished look that can be unappealing.
In addition, primer is typically not as durable as paint, and it may not provide the same level of resistance to moisture, UV rays, or other environmental factors that can cause damage or wear over time. Without a topcoat of paint, your surface may be more susceptible to peeling, cracking, fading, or other forms of damage.
Another issue that may arise if you don’t paint over primer is adhesion problems. Paint is designed to bond to the primer, and if you skip this step, you may find that the paint doesn’t adhere well to the surface or doesn’t adhere evenly. This can result in a patchy, uneven finish that looks unprofessional.
Finally, exposing primer can make cleaning or maintaining your surface more difficult. Primer is often more porous than paint, and it can absorb dirt, grime, or other contaminants that may be difficult to remove without damaging the primer or the surface underneath.
It’s important to paint over primer to ensure a finished, durable, and attractive surface. Skipping this step can lead to a range of issues that can impact the overall quality of your paint job.
Common painting mistakes that you’re prone to make
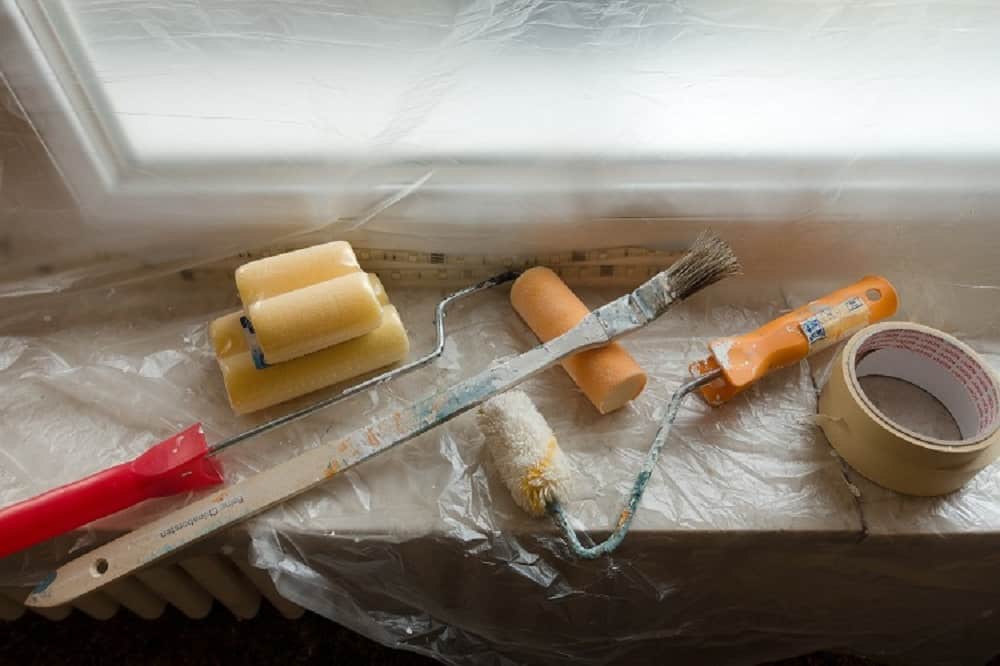
- Choosing substandard products
A lot of people are predisposed to go for cheap, otherwise substandard paint brushes and rollers after purchasing paints.
Notwithstanding for you to get impeccable results, it’s advisable to get proper quality tools.
- Improper surface Preparation
Prepping your walls or the surface to receive the paint is the ideal way to go about it. The surfaces should be free from all dust or debris, any holes patched up and primed, and should be free from any dampness.
- Preceding the use of a painter’s tape
Paintwork is all about paying close attention to detail. For your work to stand out from good work to great work with neatly cut lines and professional results, then you need not skip the tape.
Tapping guarantees that your paint won’t bleed when painting around baseboards, moldings, doors, and windows.
- Improper prepping of the workstation
During painting, you will realize that paint tends to end up in areas not initially intended.
Whether you’re a professional or a first-timer painter protecting the surroundings you’re painting around is of utmost importance.
Cover up the floor with a drop cloth, if there’s furniture sitting around you can either cover them or move them to a different location and remove all the wall hangings.
You will appreciate this initial 5-minute prep after the paintwork when you aren’t scrubbing off splatter off the floor or cleaning it off the furniture
- Skipping the primer
After you’re done with the surface preparations, you need not skip painting the priming coat.
Applying the primer ensures that the paint will bond well with the surface, and the finishing coat’s sheen is achieved.
- Dunking the entire paintbrush
Dousing the paintbrush with paint isn’t advisable. The paint eventually dries up on the bristles, and it’s quite hard to clean out the paint later on. Likewise, fully submerging a roller brush can mat down the roller.
Instead, it’s prudent to dip your paintbrush about a third way into the paint can.
Out of this, you will be saving on paint and avoiding undesirable paint splatter.
- Timing of the second coat application
Early application can ruin the entirety of the paintwork, by not allowing ample time for the first coat to dry thoroughly.
Check for the manufacturer’s instructions for the recommended dry time of the paint.
A comparison of types of paint and Primers and their drying times
Kilz and Rustoleum are two of the most used primers, profoundly used because of their outstanding sealing capabilities against tannins and grease stains and block outgrowth of molds, and mildew.
The primers also aid against damage caused by humidity.
Dry time for the Kilz primer
The dry time for Kilz primer can vary depending on several factors, including the type of Kilz primer being used, the surface being primed, and environmental conditions such as temperature and humidity.
Kilz recommends allowing their primers to dry for at least one hour before applying a topcoat of paint. However, it’s always best to consult the specific product label for recommended dry times and application instructions for the best results.
Additionally, it’s important to note that while the primer may feel dry to the touch within an hour or so, it may take longer for the primer to cure and fully provide the best adhesion and protection. Kilz recommends waiting at least 24 hours before painting over their primers to ensure proper adhesion and a long-lasting finish.
Rustoleum Primer drying time
Rust-Oleum offers a range of primers designed to prepare surfaces for painting. The drying time can vary depending on the specific product, primed surface, and environmental conditions.
In general, Rust-Oleum recommends allowing their primers to dry for at least 30 minutes to an hour before applying a topcoat of paint. However, checking the specific product label for recommended dry times and application instructions is always best.
It’s important to note that while the primer may feel dry to the touch within an hour or so, it may take longer for the primer to cure and fully provide the best adhesion and protection.
Rust-Oleum recommends waiting at least 24 hours before painting over their primers to ensure proper adhesion and a long-lasting finish.
Unparalleled Painting Situations
On the contrary, not all paints and primers fall under the Latex or oil-based categories.
Spray and chalk paints are tremendously becoming popular owing to their fast dry properties and ease of application.
- Enamel spray paint takes around 30 minutes to feel dry wilt will require at least 5 hours to receive the second coat.
- Lacquer spray paint feels dry after about 5 minutes but will be ready for the second coat in about 2-3hours
- Polyester and epoxy paints dry in less than 5 minutes due to the chemical reactions that undergo within the compounds but will require about 30 minutes to receive the second coat
Warp up on How Long should you wait between primer and paint
Knowing how long to wait between primer and paint will unburden you with quite a great deal of headache and save you from messy paintwork and having to redo the works
Pro tip
I commend screening the freshly primed surface for tackiness before ongoing with the paint job. Ensure that primer and paint are applied vigorously to ensure the pigment blends thoroughly in the solution.
The majority of the latex primers take about an hour to dry out. Notwithstanding, you should at least wait for at least 3-4 hours before applying the second coat.
On the other hand, oil-based takes longer to dry out, about 24 hours.
However, high humid and cold temperature conditions will protract the dry periods for the primers and the paints.
Waiting for the paint to dry out also gives ample time for the paint to cure thoroughly.
Read more on: Best Space Heater for a Large Room– 5 Most Energy Efficient
